You can enable Dynamic Remediation for Vulnerability Scanning within Rootshell to assist you when using scans to retest whether your remediation has been successful.
This feature compares the last scan in Rootshell with the latest scan you are importing, and highlights the differences, before dynamically remediating issues that are no longer present; you can select which issues to remediate or not. This is particularly useful for large digital estates.
Follow these steps to enable Dynamic Remediation:
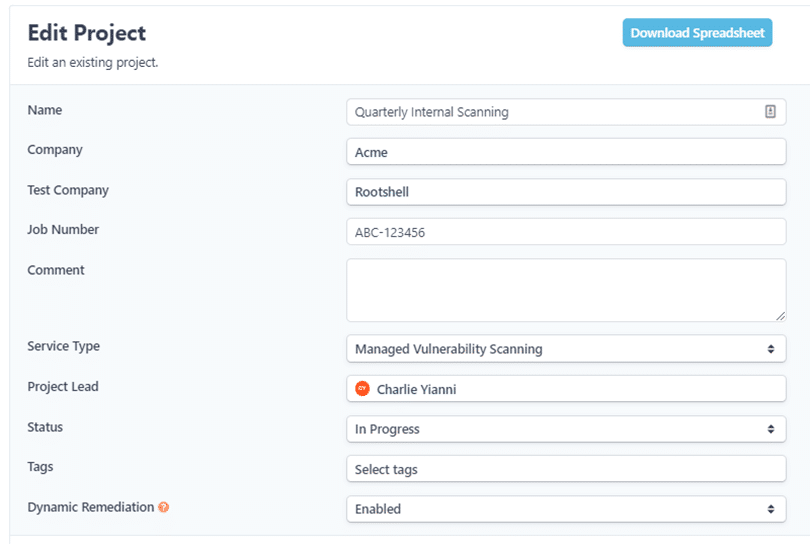
Step 1: Navigate to Projects on the Menu.
Step 2: Select your Project from the list.
Step 3: On the Edit Project screen, select ‘Enabled’ from the Dynamic Remediation drop-down. Here, you can also disable it.

Step 4: Click ‘Save Project’.
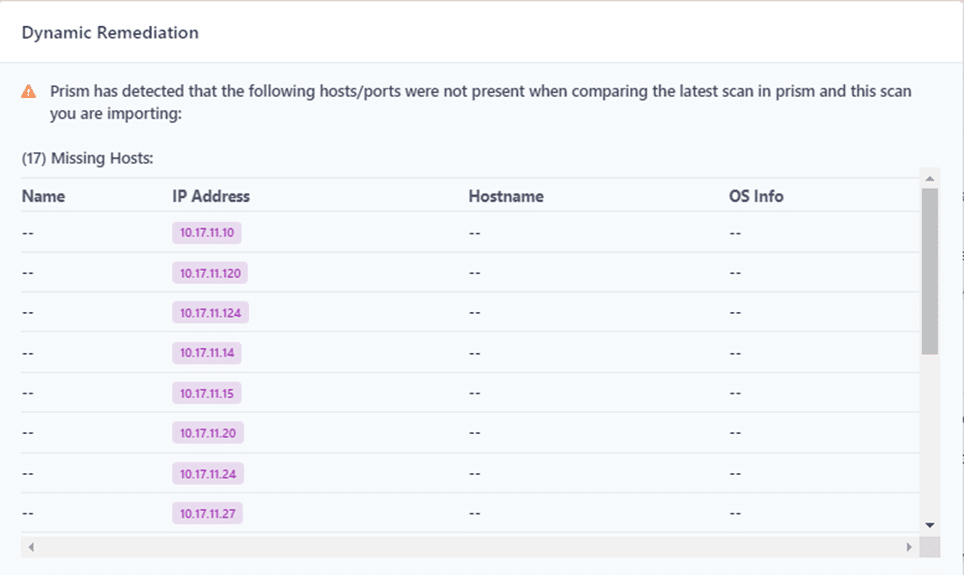
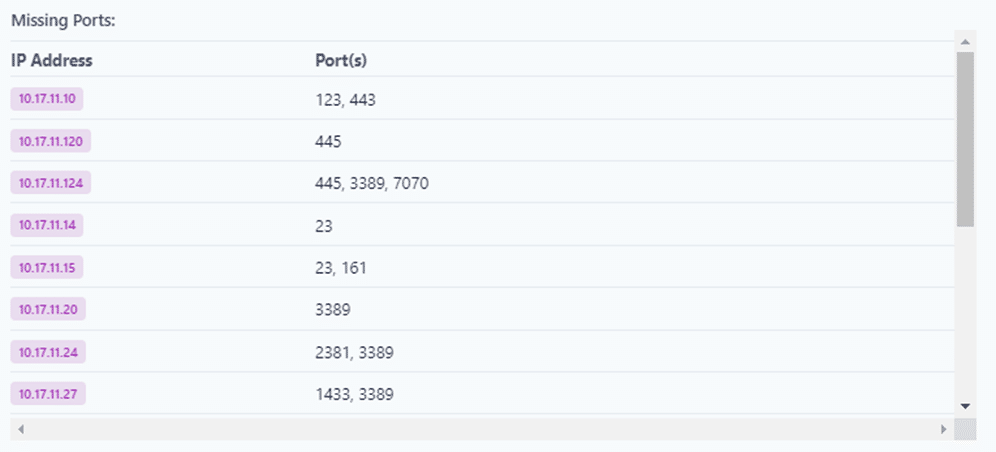
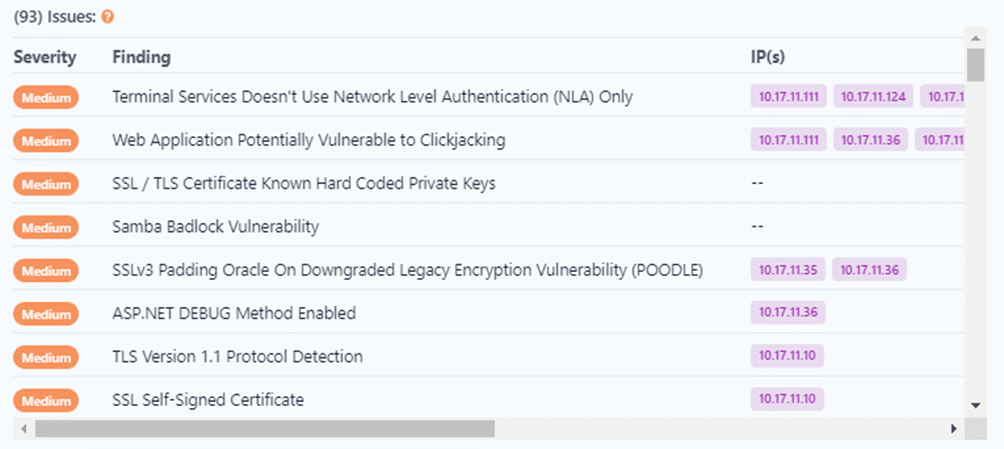
You will be presented with a comparison once you close a subsequent scan, which will detail the differences between this scan and the previous one.
This information includes:
- Missing hosts

- Additional missing ports or the ports that were associated to the missing hosts

- Those issues that, as a result of those differences, are candidates for automatic remediation

- Finally, it is your choice what you would like to do next:

-
- Cancel – back out of the operation
- Complete Without Remediation – close off the scan but not perform any issue remediation steps
- Complete and Remediate – Rootshell will mark those issues displayed as remediated in past scans at once
Subscribe So You Never Miss an Update


