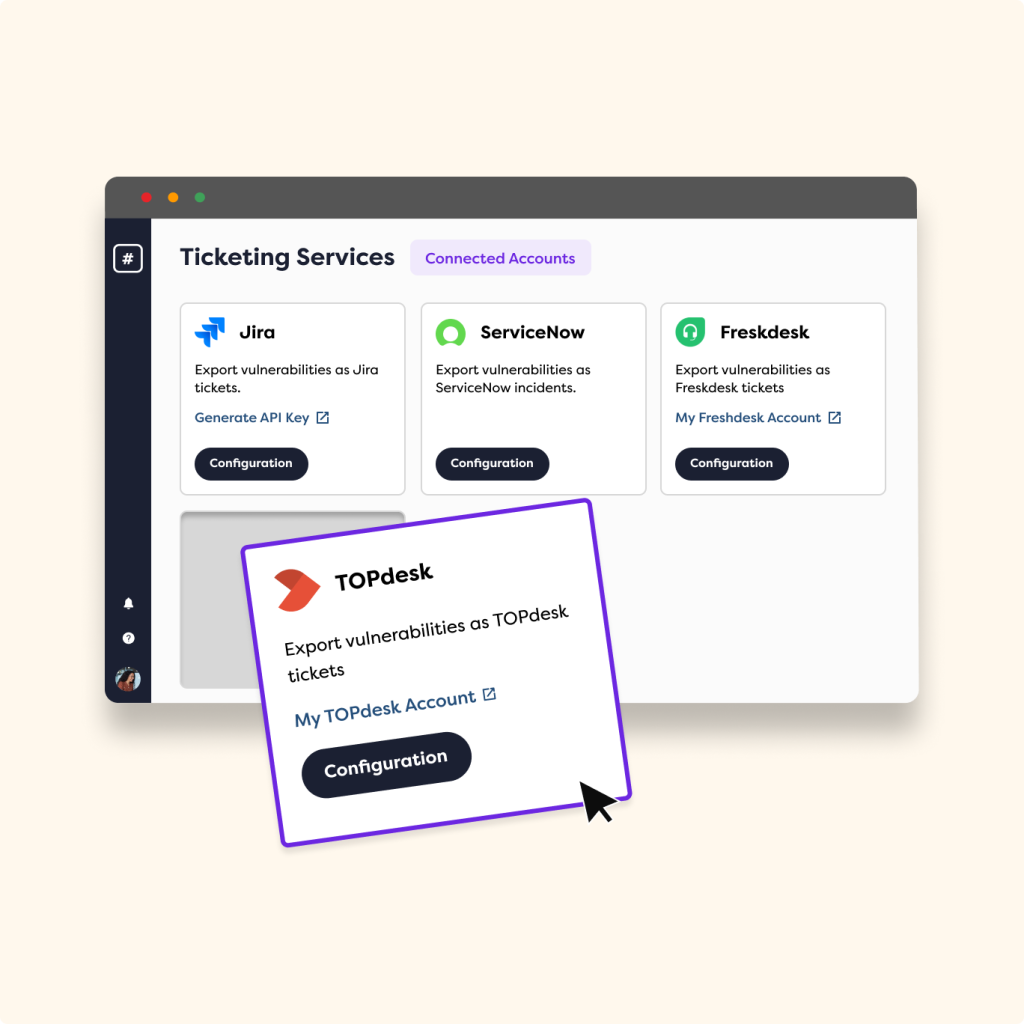
Ticketing systems
TOPDesk
Helps busy service teams handle incoming requests, automatically assign tasks to the right people, and see who’s doing what.
Ticketing systems
Freshdesk
Export issues to Freshdesk effortlessly for seamless tracking and assignment.
Ticketing systems
ConnectWise
Reduces friction, strengthens workflows, and turns vulnerability intelligence into real, operational outcomes.

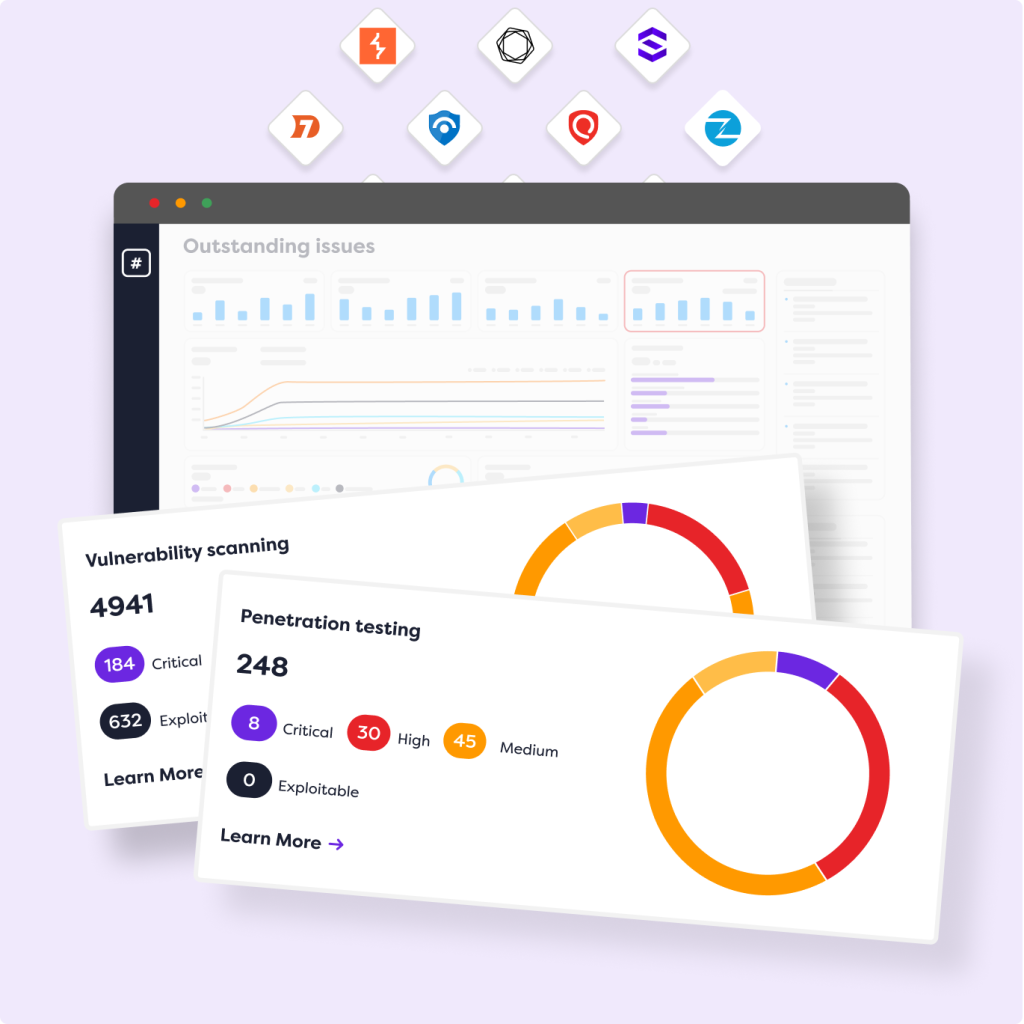
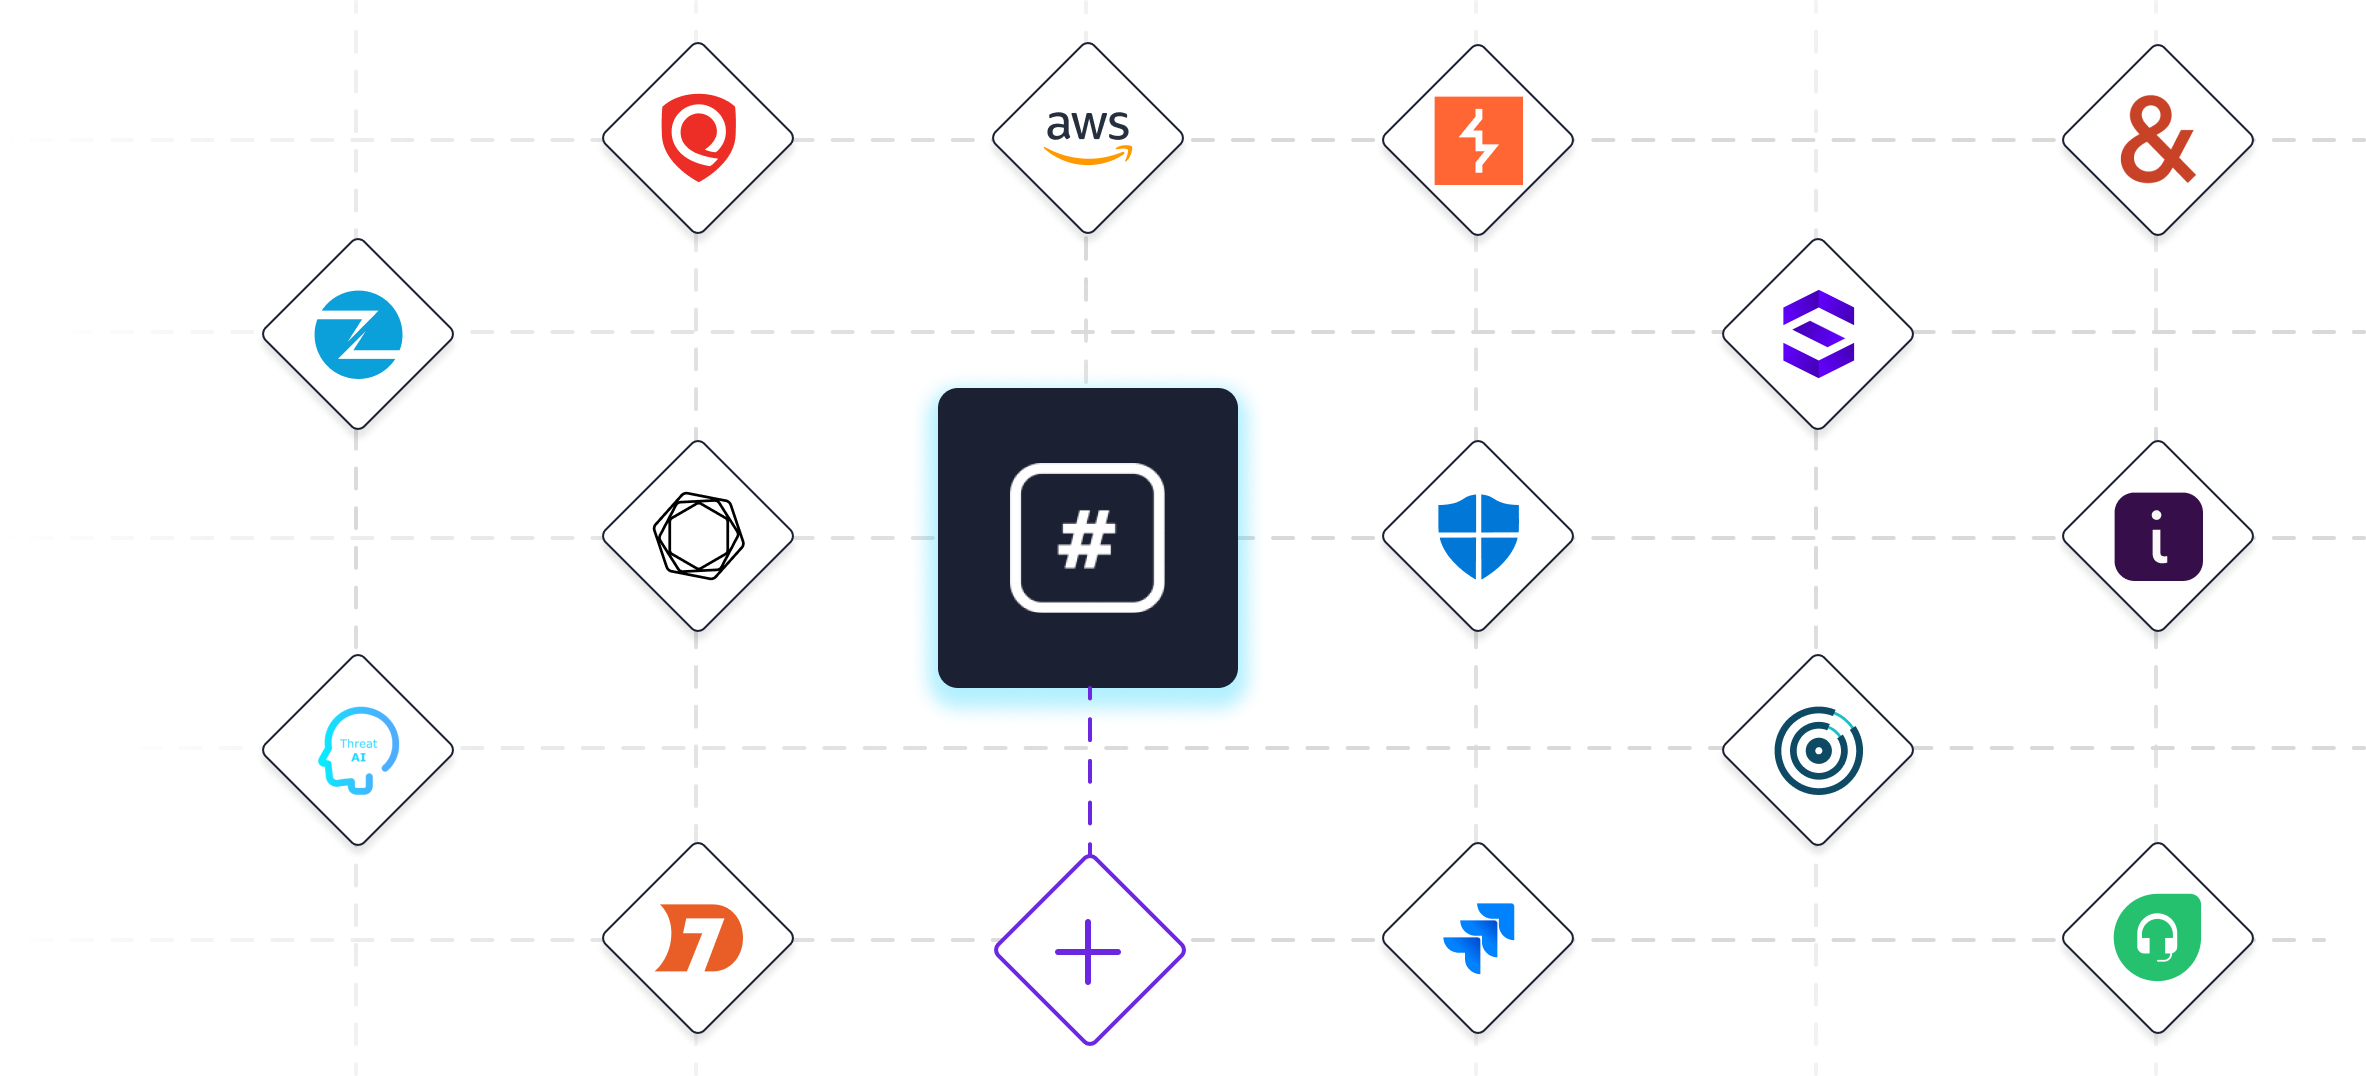
Scanner integrations
AWS
Secure cloud management with AWS integration.

Exploit intelligence
CISA
Stay compliant with top cybersecurity guidelines.

Exploit intelligence
Exploit Database
Quickly identify vulnerabilities with a vast exploit repository.

Scanner integrations
invicti
Streamline web security testing.

Ticketing systems
Jira
Integrated project management for remediation.

Exploit intelligence
Mitre Att&ck
Strengthen defenses with adversary tactics mapping.

Scanner integrations
Outpost24
Ensure proactive security with continuous assessment.

Scanner integrations
Qualys
Robust, cloud-based vulnerability management.

Scanner integrations
Tenable
Gain critical cybersecurity insights.